You asked, I made! – Squash Rounds with Shallot-Cider Sauce

A few weeks ago I posted the link to the recipe for this and asked people to like it if they thought I should make it.  It got a few likes so I went ahead with it.  Good thing I did too because it turned out great!  This is a great little twist on butternut squash if you’re not feeling the usual puree or soup.  You’ll note that I’ve switched out some of the not so healthy ingredients for their healthy counterpart.

IMG_16261 3-pound butternut squash with a 6-inch neck

2 tablespoons olive oil

2 cups thinly sliced shallots (8-10 medium)

1 teaspoon rapadura (or succanat if you cant find rapadura.  Rapunzel is labeled as whole cane sugar but it’s real rapadura)

1/2 teaspoon sea salt

1 cup apple cider

1 tablespoon cider vinegar

1/2 cup chopped walnuts, toasted

IMG_1628


Preheat the oven to 350 degrees.  Coat a large baking sheet with olive oil.

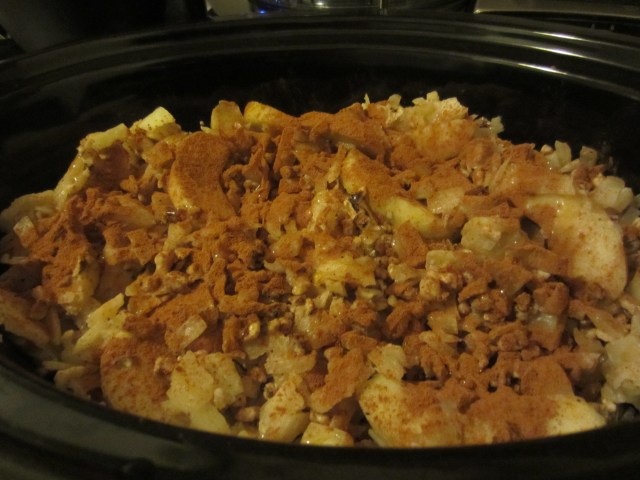
Cut the neck off the squash and peel it.  Slice into 1/2 inch thick rounds; remove any stray fibrous threads or seeds in the centers.  (Reserve the  rest of the squash for another use, such as squash puree).  Place the rounds on the baking sheet.  Cover with foil.

Bake for 20 minutes.  Remove the foil and continue baking until the squash is tender, about 20 more minutes.

Meanwhile, heat oil in a large skillet over medium heat.  Add shallots, rapadura, and salt and reduce heat to medium-low; cook, stirring often, until the shallots are softened and beginning to brown, about 5 minutes.  Stir in cider and vinegar and cook until most of the liquid is evaporated, 6-10 minutes.

IMG_1629

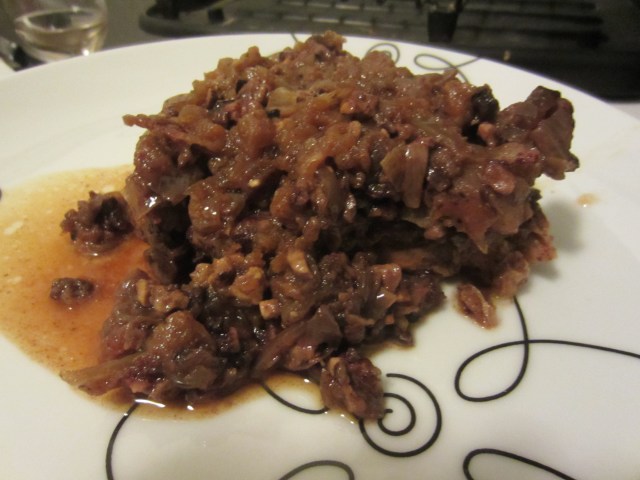
To serve, place 1 squash round on a small plate and top with about 2 tablespoons shallot sauce.  Place a second round on top and finish with another 2 tablespoons of the sauce and a sprinkling of walnuts.  Repeat with the remaining rounds and sauce.

IMG_1631This was SO yummy.  I served it as a main dish because we had a late lunch and weren’t starving but you could also serve it as a side dish.  Happy cooking!


Slow Cooker Thursday – Fruit & Nutty Pork Chops

It’s time for another edition of my slow cooker series.  I’ve decided to do a slow cooker post every Thursday.  It might be a tall order as the semester gets under way.  We’ll see.  This week I did pork chops and they turned out pretty good!

IMG_15892 tablespoons coconut oil

5-6 thick-sliced pork chops

2 tart apples

1 cup walnuts, coarsely chopped

2 small onions, chopped

2 cloves garlic, minced

1 tablespoon sea salt

2 teaspoons coarse black pepper

1 tablespoon raw honey

IMG_15941. Turn you slow cooker on high so it can warm up.

2. Melt the oil in a large frying pan on the stove.

3. Once the oil is hot, brown the pork chops on each side for about 2 to 3 minutes.

4. Put your chops in the slow cooker.

5. Place the apple slices in the drying pan, along with the walnuts, onions, garlic, salt, and pepper and cook until onions and apples are soft.

6. Pour the apple mixture over the pork chops.

7. Sprinkle the cinnamon over the meat and drizzle with the honey.

8. Cover and lower the temperature to low.  Cook for 8 hours.

IMG_1595I’ve never had a slow cooked pork chop and I really like it.  I hope you do too.  Happy cooking!

~Laura

Weekly Slow Cooker Recipe – Chicken Cacciatore – Paleo!!

It’s time for my weekly edition of Laura’s slow cooker recipe.  This recipe is from Paleolithic Slow Cooker. I find the name of the cookbook entertaining since I’m pretty sure they did not have slow cookers in the Paleolithic era!  But for all you Paleo peeps out there, this is for you (and for regular people too) 🙂

IMG_1573


3 tablespoons coconut oil

2 pounds bone-in chicken breast

2 stalks of celery, sliced

4 cloves garlic, minced

1 large onion, chopped

3 large bell peppers – any color, sliced

15 oz diced tomatoes (about 3.5 tomatoes)

1 tablespoon oregano

IMG_15761. Turn your slow cooker on high while you get your ingredients ready.

2. Place the coconut oil on the bottom and allow it to melt.

3. Place the remaining ingredients into the slow cooker and reduce the slow cooker to low.

4.  Cook for 7 to 8 hours.

5. Serve with spaghetti squash if desired. (I did not because the soupy style seemed more interesting to me plain).

IMG_1579


This recipe is super easy and very healthy since the meat has been cooked on the bone.  The minerals and nutrients from the bone end up in the broth and the slow cooking nature of it keeps them viable.  Beware, there is no salt in this so if you like your stuff salty, add a teaspoon before you start cooking.  This recipe is great for a work day, you throw everything in in the morning and come home from work and it’s ready!  Happy cooking!


For my veggie followers – Roasted Tempeh with Shiitake and Sweet Potato

I am by  no means a vegetarian but every once in a while its interesting to try a veggie recipe.  I am completely against tofu because its so processed but tempeh is okay in my book.   I haven’t cooked with it in years so when I came across this recipe in Hungry for Change I decided to try it.  I’m pretty impressed with the results.  It smelled so good baking and tasted even better!

IMG_15671 12 oz block of organic – non-GMO tempeh, cut into 4 equal pieces

For the Marinade:

2 garlic cloves

2 tablespoons whole grain mustard

2 tablespoons raw honey or maple syrup

2 tablespoons balsamic vinegar

2 tablespoons raw apple cider vinegar

1/2 cup extra-virgin olive oil

For the Shiitake and Sweet Potato:

2 tablespoons coconut oil

1 sweet potato, washed (and peeled, if desired), cut into 1/2-inch dice (not to be confused with a yam, sweet potatoes are white on the inside)

1 medium red onion, cut into 1/2-inch dice

8-10 shiitake mushrooms, stems removed

2 garlic cloves, minced

4 kale leaves, stems removes, torn into bite-size pieces

Unrefined sea salt

IMG_1569To prepare the tempeh, place the cut pieces into a non-reactive glass baking dish.  Blend all the marinade ingredients together in a blender for 30 seconds, them pour over the tempeh.  Allow tempeh to marinate for at lease 1 hour or, ideally, overnight.

Preheat the oven to 350 degrees.

Bake the marinated tempeh in its baking dish for 30 minutes.  Tempeh is baked sitting in its marinade. While the tempeh is cooking, make the hash. Melt oil in a heavy-bottomed pan, preferably cast-iron, over medium-high heat.  When the oil is hot, add the sweet potato and onion.  Saute, stirring often to prevent sticking, until the sweet potatoes are just about fork tender.  Stir in the shiitake caps, garlic, and kale leaves.  Saute all until the kale is wilted and tender.  Season with salt to taste, then divide the mixture between two serving plates.  Top with pieces of the tempeh and serve.

IMG_1571This was as super easy, quick meal that left me wanting to eat the whole pan of it.  Super yummy!  Happy cooking!

Throw it in and leave it – Slow-Cooked Grass-Fed Beef Osso Buco

As many of you know, I got a slow cooker for Christmas, so I’ve been looking for any excuse to use it.  I think I’ve decided that I’m going to do one meal a week using it because it’s so convenient!  This recipe comes from the Hungry for Change cookbook.  Are you surprised?  A note from the book about this meal: “This is a particularly nutrient-dense meal.  When cooked at such a low temperature, the meat is more tender, the nutrients are retained, the proteins are undamaged, and the fats are protected from oxidation.  Cooking meats on the bone adds additional minerals and gelatin to the dish.  We recommend using beef rather than veal, for ethical reasons, and meat that is grass-fed and -finished, from cows raised more naturally, grazing in open pastures in full sunlight”.

IMG_1561The meat I used was Whole Foods level 4 which is almost the best.

1 tablespoon butter

2 yellow onions, finely chopped

2 celery stalks, finely chopped

2 carrots, finely chopped

3 garlic cloves, chopped

2 teaspoons unrefined sea salt

8 anchovies, bottled in olive oil or brine, drained

4 bay leaves

1 whole cinnamon stick, snapped in half

2 fresh thyme sprigs or 1 teaspoon dried thyme

3/4 cup red or dry white wine (organic, sulfur-free, or containing minimal sulfur: 220/202)

4 ripe tomatoes or 1 cup tomato puree out of a glass bottle

1/2 cup spring or filtered water

4 or 5 shank cuts of grass-fed and -finished beef osso buco (they don’t usually have these in the case but if you ask they generally have them in the back)

1/2 teaspoon freshly ground black pepper

Fresh flat leaf parsley, chopped, for garnish

IMG_1562


Preheat the oven to 195 degrees.  (I didn’t feel comfortable leaving my gas oven on all day while I was at work so I used my slow cooker instead.  It turned out perfect!)

Melt the butter in a large cast-iron pot set over low heat.  Add the onions, celery, carrots, garlic, and salt, and gently saute until everything is soft and the onions are translucent.  Add the anchovies, mashing them into the base of the pot with the back of a wooden spoon until the anchovies begin to melt.  If you omit them, add more of the unrefined sea salt.

Add the bay leaves, cinnamon stick pieces, and thyme, and pour in the wine.  Increase the heat slightly and gently simmer everything for another couple of minutes.  The alcohol will cook out and the liquid will reduce slightly.  Then add the tomatoes, the water, and the pepper, stirring thoroughly to incorporate, and remove the pot from heat.

Gently add the beef pieces and submerge them in the liquid and vegetables until they are positioned at the bottom of the mixture.  (I put the meat pieces in my slow cooker and poured the veggie mixture over them).  Cover and place in the oven.  Cook for 10 to 12 hours (I just set my slow cooker to 10 hours and it did the temp and everything for me).  (For quicker cooking time set, the oven to 250 degrees.  It will be ready in 6 to 8 hours).

The osso buco is ready when it’s tender and easily comes away from the bone.  Serve with its nutrient-rich sauce spooned over each piece and a generous sprinkling of chopped parsley as a garnish (I totally forgot about the garnish).  If desired, pair the osso buco with a simple green salad, or sauerkraut to aid in digestion.  And don’t forget to eat the marrow!

IMG_1566


This was another big win from this book.  It was SOOOOO yummy!  And so easy to do.  I did the prep the night before and kept it in my fridge and then put it all in my slow cooker the next morning.  I came home from work to a house that smelled amazing and dinner that was already ready for me!  Happy cooking!


Hungry for FISH! – Provencal Snapper with Swiss Chard

I have never been a fish person.  For my entire 20s I literally didn’t eat fish at all.  But as a person passionate about healthy eating, I can’t ignore the health benefits of our little gilled friends.  So, the past few years I’ve added fish back onto my menu.  Now, I’d say I eat it at least once a week.  This recipe is also from the Hungry for Change cookbook.  I wasn’t kidding when I said it’s rocking my world!

IMG_15552 6-ounce fillets of snapper, pin bones removed (I had the butcher remove the bones)

Grated zest from one lemon

1/4 cup capers

2 springs fresh thyme (I used dried because I couldn’t find the whole kind)

Extra-virgin olive oil to drizzle over the fish, plus one tablespoon for the chard

Unrefined sea salt

Freshly ground black pepper

4 cups of Swiss chard, washed and roughly chopped

IMG_1556Preheat the oven to 425 degrees.

In an oiled baking dish, place the snapper fillets (you can also use pacific rock fish.  That are pretty much the same).  Sprinkle them with the lemon zest and capers, and lay the thyme sprigs over the top (or in my case, sprinkle dried thyme).  Drizzle with olive oil and season with salt and pepper to taste.  Cover the dish with foil.  Bake for 15 minutes.

IMG_1557

While the fish is baking, heat 1 tablespoon of olive oil in a saute pan.  Add the Swiss chard, cover, and let steam for just 2 minutes.

IMG_1558

Serve the fish on a bed of the chard.  Spoon any remaining baking juices and capers over the fish.  Garnish with additional sprigs of fresh thyme.

IMG_1559The night I made this I did NOT want to cook.  It was late and I was exhausted and had a million things to do.  But this was super easy and fast, not to mention delicious and healthy to boot!  Happy cooking!


Hemp Pesto Halibut

We’re back to regular photography sadly, but I do have a new cookbook and so far its a good one!  The Hungry for Change cookbook is rocking my world right now!  Remember the last time I did halibut and I said I would never do it again?  This recipe changed my mind!

IMG_15501 medium beet, finely diced (equal to roughly 1 cup)

1 clove garlic, diced

1/2 cup hemp seeds

Juice of two lemons, plus thin lemon slices as needed

1/2 cup fresh basil leaves

1/4 cup extra-virgin olive oil, plus additional for the fish

1 pound halibut, cut into 4 fillets (or any wild-caught fish, such as cod or haddock)

1 to 2 teaspoons unrefined sea salt

Freshly ground black pepper

2 large handfuls of lettuce greens tossed in a mix of olive oil and lemon juice

Preheat the oven to 350 degrees.

To prepare the pesto, place the beet, garlic, and hemp seeds into a food processor (I used my Vitamix blender).  Pulse until finely chopped, then add lemon juice and basil, plus salt to taste.  Keep processing while drizzling in the olive oil.  This pesto is best on the thicker side, so add only enough oil to help puree the mixture.  Puree to the smooth consistency of a typical pesto, then set aside.

IMG_1551

To prepare the fish, coat fillets with olive oil, salt, and pepper.  Place them in an oiled baking dish, covering each fillet with thin slices of lemon.   Bake uncovered for 10 to 25 minutes, or until the fillets are cooked through (check with a fork).

IMG_1552To serve, divide the lettuce greens between four serving plates.  Top each bed of greens with a baked fillet, then place a scoop of the pesto onto each piece of fish.  Serve warm.

IMG_1553This turned out super delish!  Halibut is back on my good list.  Happy cooking!

Guest Photographer! – Japanese Curry

The photos are here and its finally time to post about my evening with Yelp Elite reviewer and student food photographer Mary Colleran! First, a little background, Mary is one of my fellow LMU MBAers.  She recently graduated and expressed an interest in learning how to cook.  I, on the other hand, have been wondering how to get some better pics of my cooking.  I LOVE my little Canon Elph but it’s not really up to the task of really great up close food pics.  So Mary and I decided to do a collaboration.  I cook, she watches/learns and takes photos.  Problem solved!  I wanted to cook her something she really likes since she’s taking the time to drive to my place and wait around while I put everything together so when she said she was really loving Japanese curry at the moment I thought “why not?  I’ve never tried that before!”.  I found a recipe from the Japanese Food Report.  I wanted it to be as authentic as it could be coming from a “white girl’s” kitchen.   So here it is!

IMG_1346 (2)All photos are styled, shot and chosen by Mary Colleran.

IMG_1359 (2)10.5 oz beef brisket (you can also try short ribs or other cuts but I used brisket), cut into bite-sized cubes

Salt and pepper for the beef

2 1/2 tablespoons butter

14 oz onions, sliced as thin as possible

2 teaspoons ginger, finely grated

2 cloves garlic, minced

1 large carrot, peeled and cut into wedges, ringiri style (I had to Google this one.  See photo)

1 large apple, peeled and coarsely grated

5 cups beef stock

1 tablespoon salt (I used half this)

10.5 oz new potatoes, peeled and cut into bite-sized pieces

IMG_1363 (2)FOR THE ROUX:

4 tablespoons butter

7 tablespoons flour (I wanted to use whole wheat but there was an unfortunate mishap the prevented it.  White flour was fine)

2 tablespoons curry powder (Japanese preferred but I used Madras and it worked well)

2 tablespoons garam masala

1. Season the beef with salt and pepper.

2. Melt the butter in a stock pot large enough to hold 5 quarts of liquid, over medium heat.

IMG_1365 (2)Add the onions, ginger, garlic, carrots and beef.

IMG_1373 (2)Stir and cook for about 5 minutes until the onions become translucent and the beef browned.

IMG_1377 (2)Add the apple, beef stock and salt, and simmer uncovered for about 20 minutes, stirring occasionally.

IMG_13783. Meanwhile make the roux.  In a skillet, melt the butter over medium heat

IMG_1381and add the flour.

IMG_1383Stir, stir, stir, stir, stir until the butter and flour fuse and swell.

IMG_1384Don’t stop stirring or the roux will burn!

IMG_1386After about 20 minutes or so, the roux will become the “color of a fox” as the say in Japan, or a deep tan color.

IMG_1396

At this point, add the curry and garam masala, and cook and stir for 30 seconds, until the spices release their aroma.  Turn off the heat, add a ladlefull or two of cooking liquid from the stock and mix into the paste.

IMG_14014. Add the roux paste into the stock pot and stir to combine.  Add the potatoes.

IMG_1409Simmer uncovered on low heat, stirring occasionally.  Cook for about 1 hour, or until the beef becomes tender and the curry thick.  Serve the curry with Japanese short grained rice (I used brown to be healthy) on the side.

IMG_1423I have to give a big thanks to Chef Nobuko-san from the Japanese Food Report.  I don’t often brag about the food I make but I honestly think this is the best thing I have ever made.  It was so delicious that after Mary had gone for the evening, I stood over the pot on the stove eating spoonfuls of the stuff.  It really turned out well.  I hope it does for you too!  A huge thank you to Mary!  Happy cooking!

Happy 2013! – Forgotten Jambalaya

Happy 2013 to you all!  I hope you had a wonderful NYE with friends and family.   Tonight I am serving something new.  Usually I cook a traditional Brazilian meal for New Years but I decided to go back to some different roots and serve Jambalaya!  My paternal grandmother is originally from New Orleans so this is my tribute to that part of my heritage!  I used my brand new slow cooker to make this and my brand new slow cooker cookbook, both things I got for Christmas from my cooking wiz mom.

IMG_14871 can (14 1/2 oz) diced tomatoes, undrained

1 can (14 1/2 oz) beef or chicken broth (I used boxed and weighed it out with a kitchen scale)

1 can (6 oz) tomato paste

2 medium green peppers, chopped

1 medium onion, chopped

3 celery ribs, chopped

5 garlic cloves, minced

3 teaspoons dried parsley flakes

2 teaspoons dried basil

1 1/2 teaspoons dried oregano

1 1/4 teaspoons salt

1/2 teaspoon cayenne pepper

1/2 teaspoon hot pepper sauce

1 pound boneless skinless chicken breasts, cut into 1-inch cubes

1 pound smoked sausage, halved and cut into 1/4-inch slices

1/2 pound uncooked medium shrimp, peeled and deveined

Hot cooked rice

1. In a 5-qt. slow cooker (mine’s 6-qt but it worked fine), combine the tomatoes, broth and tomato paste.

IMG_1489Stir in the green peppers, onion, celery, garlic and seasonings.

IMG_1499IMG_1500

Stir in chicken and sausage.

IMG_1501

2. Cover and cook on low for 4 hours or until chicken is tender.

IMG_1502Stir in shrimp.  Cover and cook 15-30 minutes longer or until shrimp turn pink.  Serve with rice.

IMG_1521This one turned out really tasty.  Rob mentioned that next time I should add okra and I couldn’t agree more so if you feel so inclined, toss some in!  Happy cooking!

Christmas Eve Tamales

Happy holidays!  I’m here with my family in Knoxville, helping my mom cook up a storm (now you know where I get it from!). We have no Mexican blood in any of us but my mother grew up in New Mexico so we have adopted the tamale and posole on Christmas Eve tradition and have been doing it since before I was born.  Today I will give you our family’s tamale recipe!  It’s hard to find organic ingredients in Knoxville so none of the ones used here are, but I’m sure you could find them all if you really tried.

The first step is to cook the meat.  I don’t have a slow cooker but my mom does so we threw it in there and cooked it over night (about 8 hours) on low.

IMG_1454Now the real fun begins!

IMG_1455

Before you start cooking you need to separate the corn husks and soak in a large bowl of water.

IMG_1456

CHILE CON CARNE (Sauce & Filling)

1 3/4 pounds pork tenderloin

3-4 tablespoons bacon drippings or lard (according to Weston A Price, lard is the best oil to cook with.  The jury is still out for me but my mom uses it so it’s in the blog)

1 tablespoon flour

1/2 cup ground red chile (my mom makes a red chile sauce.  Some day I’ll post the recipe for that)

1 teaspoon salt

1/2 teaspoon oregano, or more to suit taste

2 clove garlic, minced

1/3 cups meat stock (we used the juices from the slow cooker)

1. Simmer the pork in water to cover, using medium to low heat .  Cook until tender.  (This is the slower cooker step but I put this for those who don’t have one)

2. Shred the meat.

IMG_14573. Add the flour and lard and brown it, stirring constantly.  Add the chile sauce or powder.  Stir well.

IMG_14584. Season with salt, oregano, and garlic.   Add the stock.  Cook for a few minutes until well mixed and warm.  Now you have your meat filling.

MASA (Cornmeal Mixture)

4 cups masa harina

2 1/3 cups warm water

1 1/3 cups lard

1 1/3 teaspoons salt

Corn husks

1. Add water to the masa harina.

IMG_1460Cream the lard and salt, using a mixer at medium speed.

IMG_1459Combine the lard with the masa and mix well.

IMG_14612. Spread each corn husk with about two tablespoons masa and add one generous spoon of the meat filling.  (We like out tamales meaty so we put less masa and more meat).  Fold the bottom of the husk up and role the husk over the filling like a burrito.  (In this photo you see  the Cepeda women rolling our tamales!)

IMG_1465

IMG_1466Our completed work!

3. Steam the tamales on a rack in a large steamer for 10-15 minutes.  My mom has a steamer but I don’t so if I were doing this at my place I’d do it in a large pot with a steamer basket.

IMG_1470

4. To serve, remove husks and serve with red chile sauce.

IMG_1472 And there you have it!  Have a very merry Christmas and lots of happy cooking!